GTMC
  • Preface
    • 00Introduction
    • 01Update Concepts and Update Types
    • 02Continuous Block Updates and Analysis Methods
    • 01Tick and Inter-Tick Timing
    • 02A First Look at Intra-Tick Timing
    • 03Scheduled Ticks and Scheduled Tick Components
    • 05Block Entities
    • 06Block Events
    • 01Masa Gadget
    • 02Litematica Tutorial
  • 附录
  • A.Stacks
  • B.Glossary

Table of contents

  • Preface
    • 00Introduction
    • 01Update Concepts and Update Types
    • 02Continuous Block Updates and Analysis Methods
    • 01Tick and Inter-Tick Timing
    • 02A First Look at Intra-Tick Timing
    • 03Scheduled Ticks and Scheduled Tick Components
    • 05Block Entities
    • 06Block Events
    • 01Masa Gadget
    • 02Litematica Tutorial
  • 附录
  • A.Stacks
  • B.Glossary
Loading article content
Loading
Loading article
GTMC

Graduate Texts in Minecraft

"Curiosity in 'cubic' inch."

Preface

Articles
25
Authors
12
Revised
August 2026

Community

  • About
  • Authors
  • Team
  • QQ Group

Participate

  • Contribute
  • Editorial Policy
  • Issues

Source

  • Repository
  • CC BY-NC-SA 4.0
  • Apache-2.0

Not an official Minecraft product. Not affiliated with Mojang Studios.

Contributors retain copyright. Article content is released under CC BY-NC-SA 4.0 with attribution preserved through article metadata and source history.

© 2024–2026 GTMC Collectiveec529be

GTMC

  • Articles
  • PDF
  • Glossary
  • About
  • Authors
  • Preface
    • 00Introduction
    • 01Update Concepts and Update Types
    • 02Continuous Block Updates and Analysis Methods
    • 01Tick and Inter-Tick Timing
    • 02A First Look at Intra-Tick Timing
    • 03Scheduled Ticks and Scheduled Tick Components
    • 05Block Entities
    • 06Block Events
    • 01Masa Gadget
    • 02Litematica Tutorial
  • 附录
  • A.Stacks
  • B.Glossary

Table of contents

  • Preface
    • 00Introduction
    • 01Update Concepts and Update Types
    • 02Continuous Block Updates and Analysis Methods
    • 01Tick and Inter-Tick Timing
    • 02A First Look at Intra-Tick Timing
    • 03Scheduled Ticks and Scheduled Tick Components
    • 05Block Entities
    • 06Block Events
    • 01Masa Gadget
    • 02Litematica Tutorial
  • 附录
  • A.Stacks
  • B.Glossary
Loading article content
Loading
Loading article
Masa Mod
Path: Masamod/litematica.zh.md
SDU-Little-River+1
Word count: 479
Est. read time: 3 min
Last edited: 2026-07-12
Contributors:
  • SSDU-Little-River
  • BBFladderbeanawa
Created:
2025-01-23
Last edited:
2026-07-12
URL:
https://www.techmc.wiki/en/articles/masamod/litematica
Reuse
CC BY-NC-SA 4.0
02 Litematica Tutorial

02 Litematica Tutorial

1 Brief Introduction to Litematica

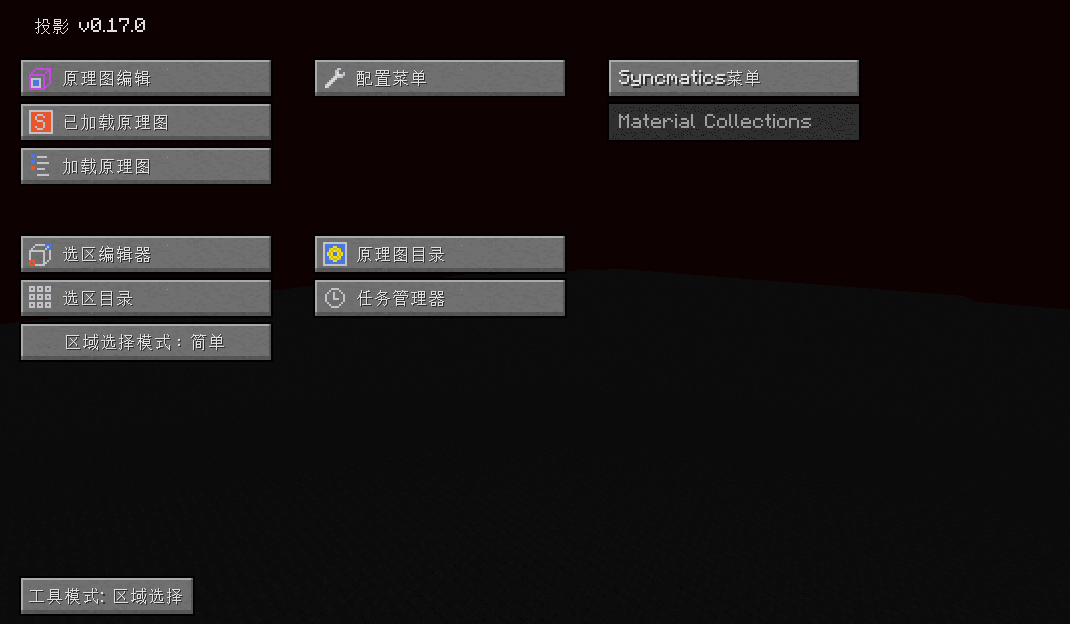
By default, the hotkey for the Litematica main menu is M. Press it to open the main menu.

In the configuration menu, you can change hotkeys and toggle various Litematica features.
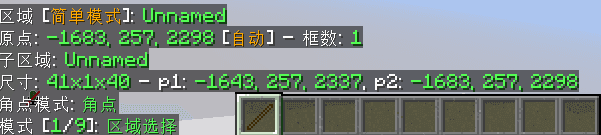
When holding the Litematica tool in your main hand or offhand, the Litematica menu bar will appear in the lower left corner.
// IMG_LOAD
In the configuration menu, you can change hotkeys and toggle various Litematica features.When holding the Litematica tool in your main hand or offhand, the Litematica menu bar will appear in the lower left corner.

Use ctrl+scroll wheel to switch modes.

1.1 Mode 1 -- Area Selection

There are two area selection modes, switchable from the main menu. Beginners should use Simple mode, and set the corner mode to "Corners" in the Area Editor.

1.1.1 Simple Mode

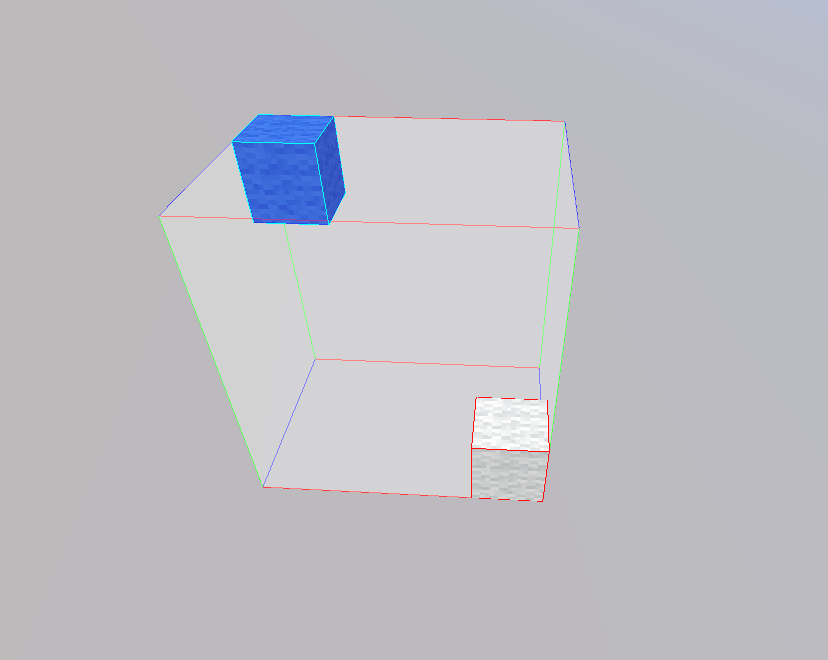
In simple mode, there is only one selection area. Left-click and right-click to set the two corner points of your selection.
Use middle-click on a corner (or elsewhere in the selection) to select it. Once selected, hold alt and scroll the mouse wheel to move the corner (or the entire selection).
// IMG_LOAD
In simple mode, there is only one selection area. Left-click and right-click to set the two corner points of your selection.Use middle-click on a corner (or elsewhere in the selection) to select it. Once selected, hold alt and scroll the mouse wheel to move the corner (or the entire selection).

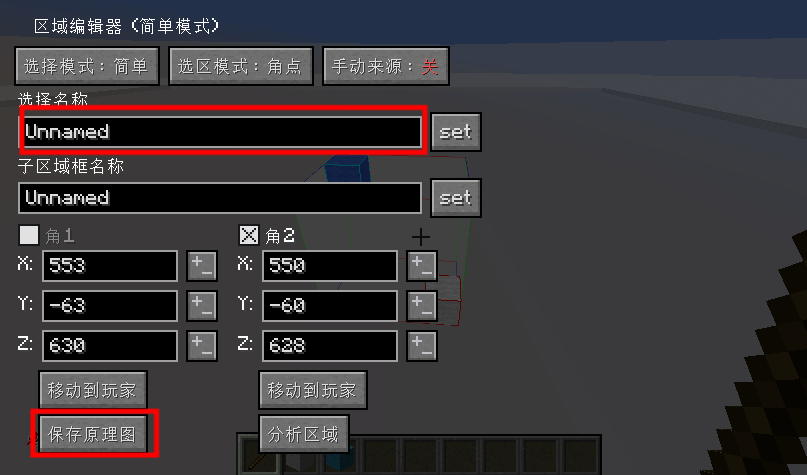
In the selection editor, you can change the name of the selection or save the schematic.
// IMG_LOAD
In the selection editor, you can change the name of the selection or save the schematic.

1.1.2 Normal Mode

For large machines, saving in simple mode can cause inconveniences during construction. Normal mode solves this.
In normal mode, selections are not created automatically. You need to create them manually:

  1. Open Litematica Main Menu - Selection Manager - New Selection
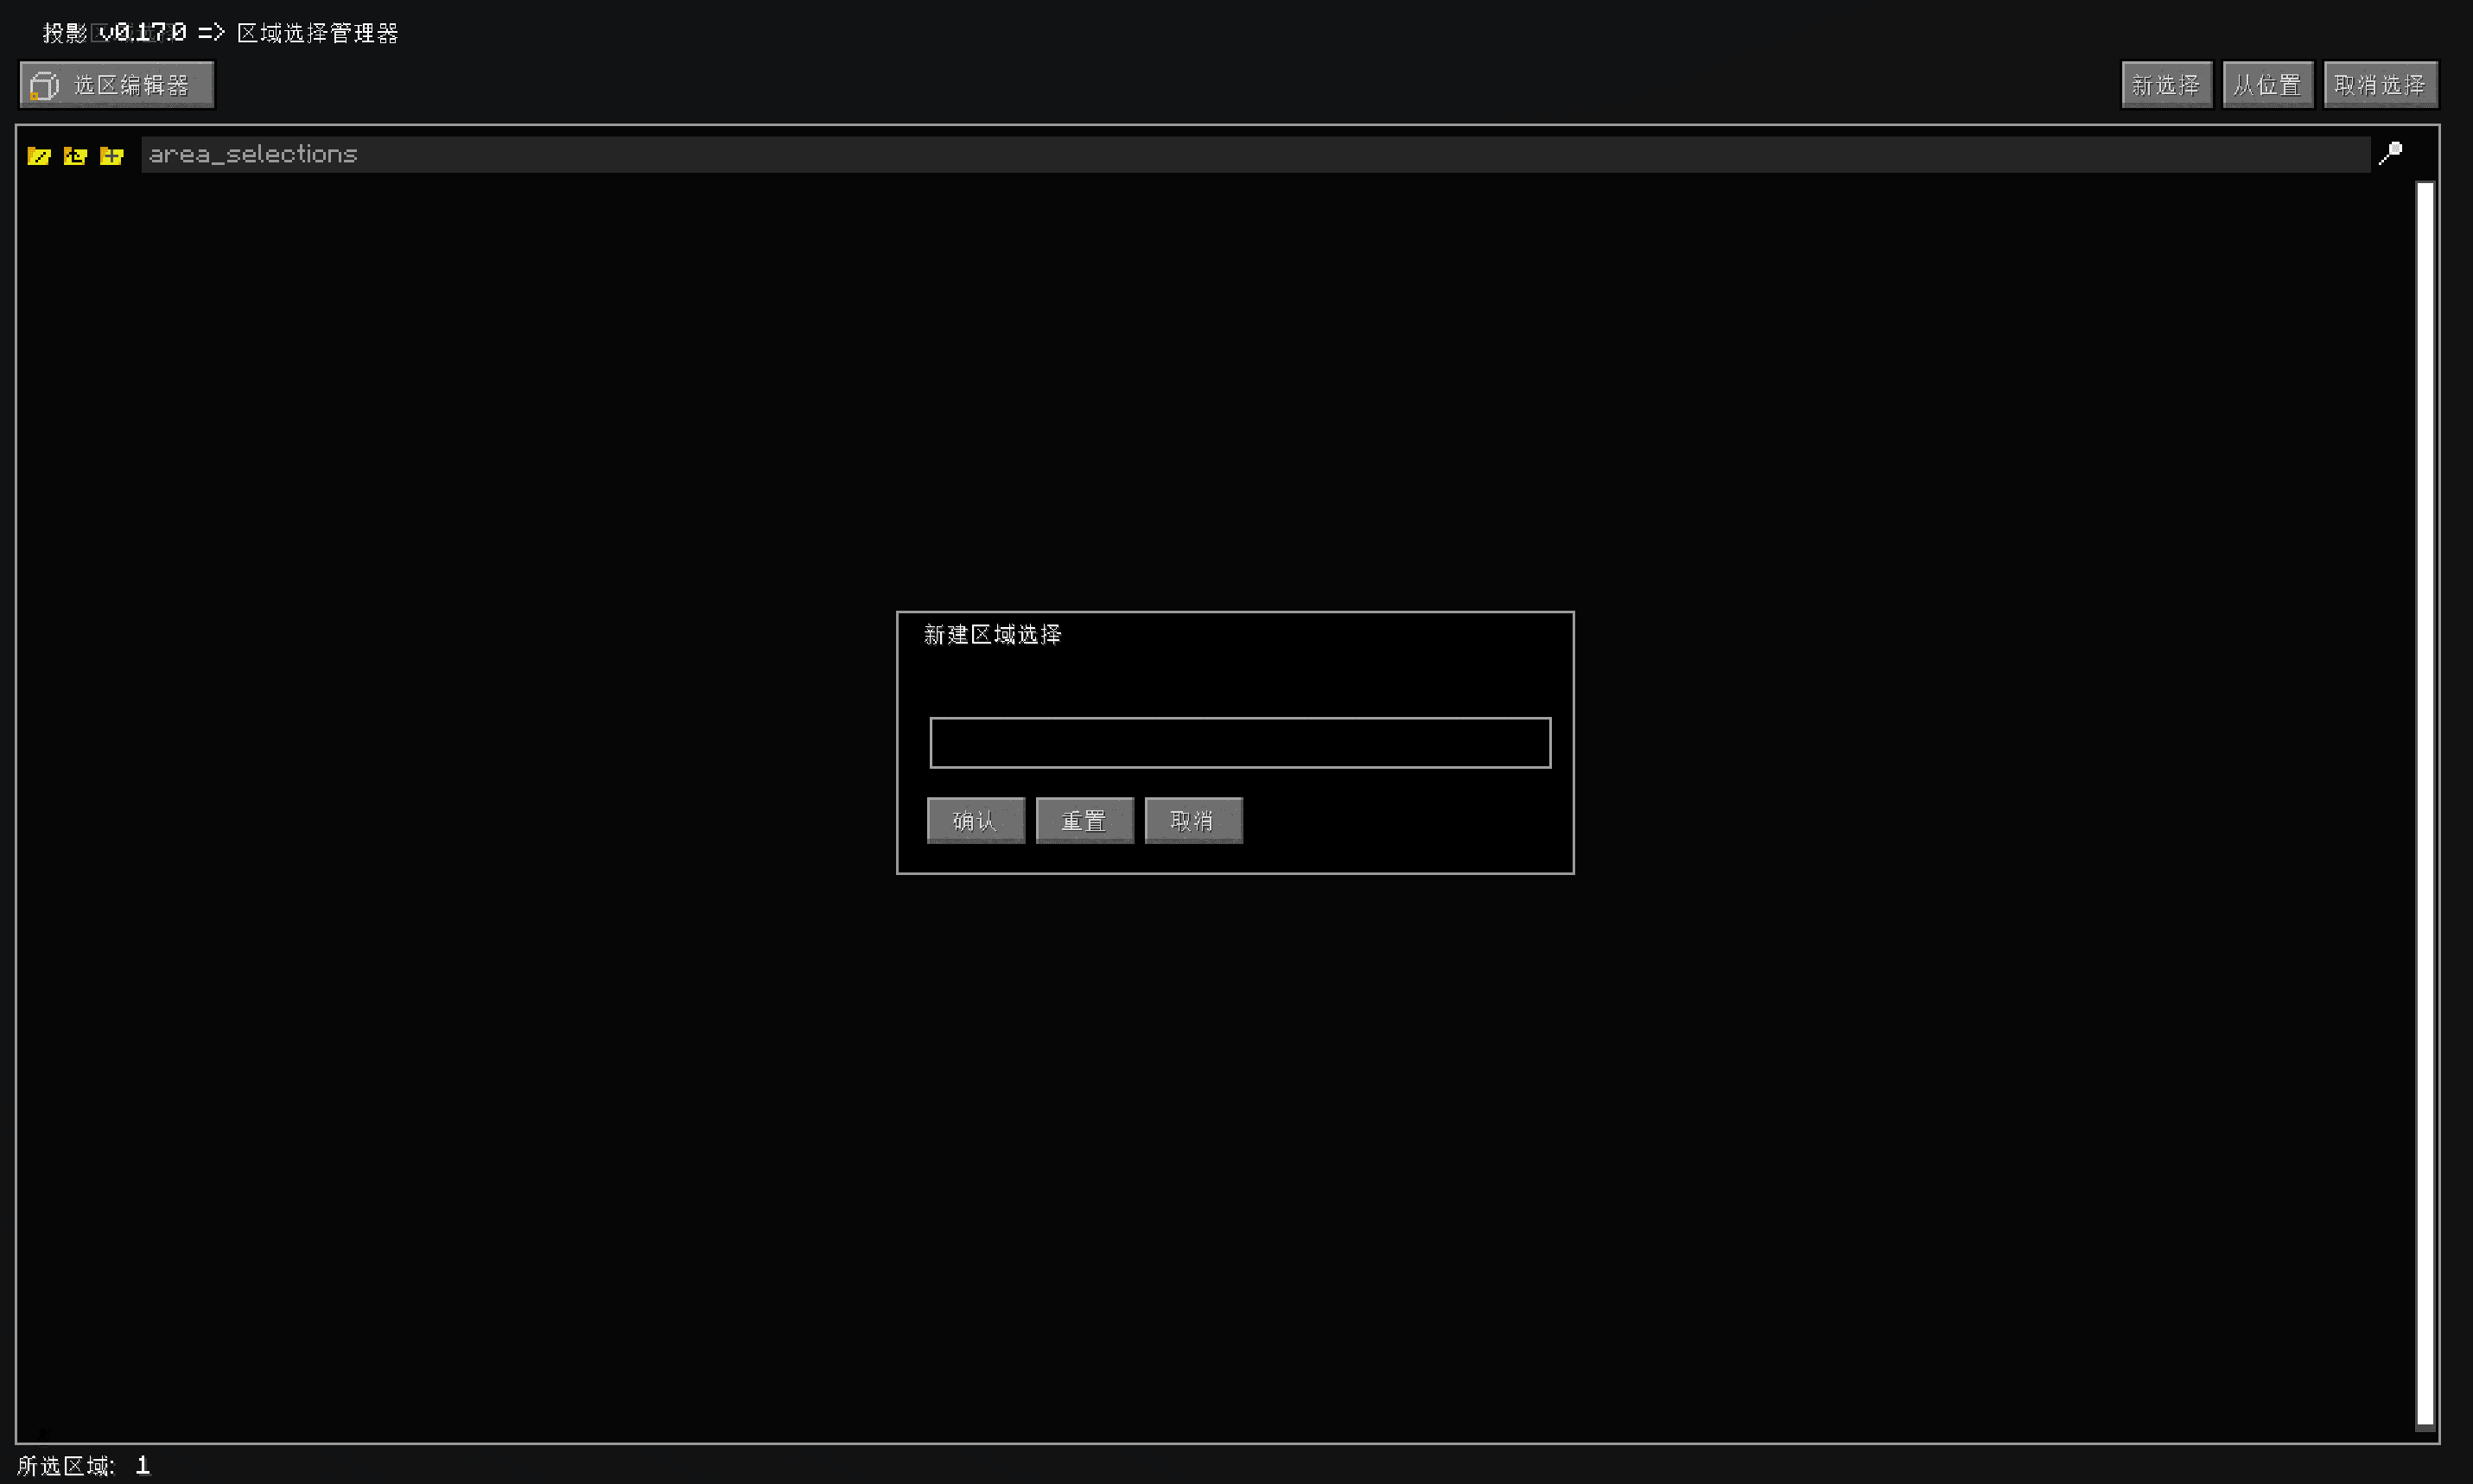
// IMG_LOAD
Normal Mode
  1. To create a sub-selection, select "New Sub-region" in Litematica Main Menu - Area Editor. You can also rebind the Add Selection hotkey in Configuration Menu - Hotkeys for faster access.
    Use middle-click to select a sub-selection corner (or the sub-selection itself).
    The final result is shown in the image
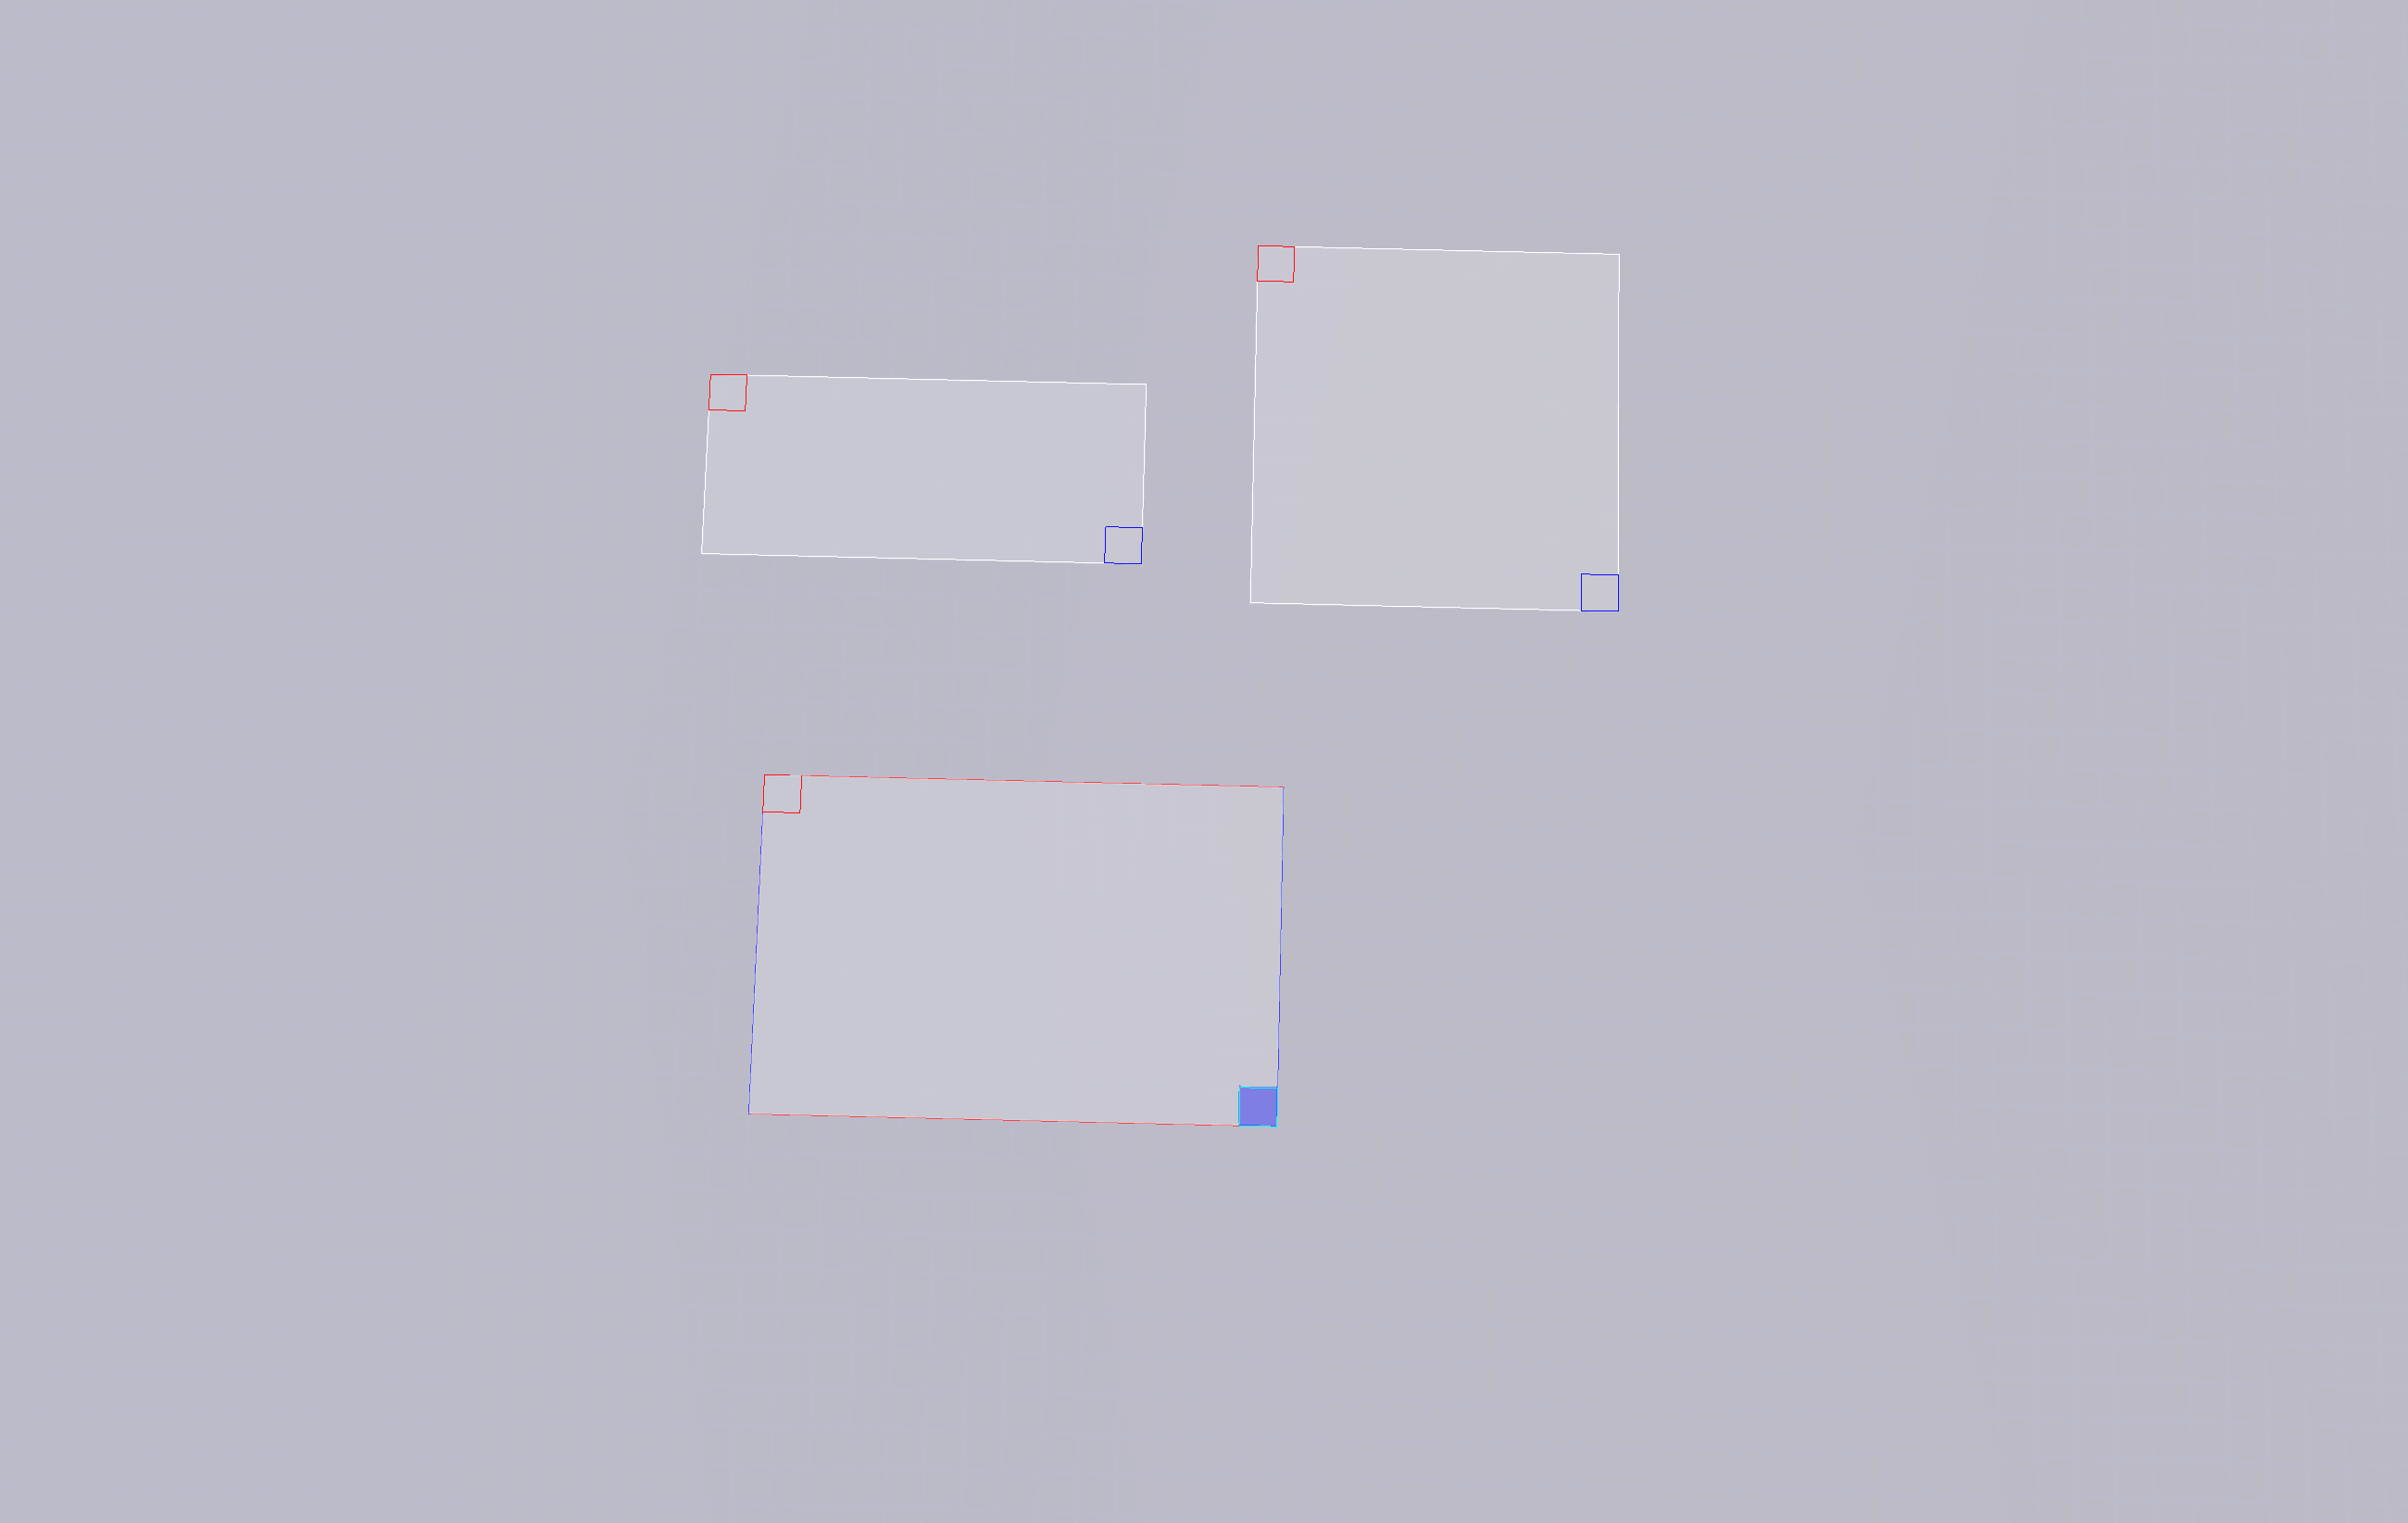
    // IMG_LOAD
    Normal Mode

    The steps to save the schematic are the same as in simple mode.

1.2 Mode 2: Schematic Placement & Mode 5: Schematic Paste

Import external schematics (skip if none).
It is recommended to enable the custom schematic directory in Litematica settings, so all game versions can share the same schematic save location.
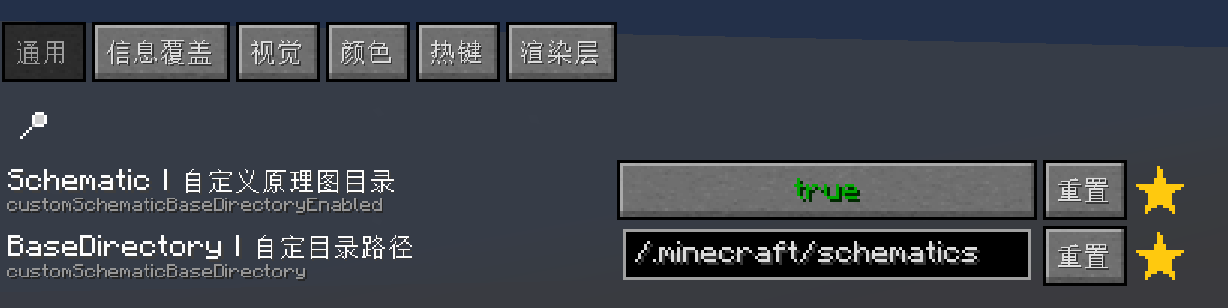
// IMG_LOAD
Import external schematics (skip if none).It is recommended to enable the custom schematic directory in Litematica settings, so all game versions can share the same schematic save location.

Then place the downloaded schematics into this folder.

  1. Load the schematic in-game

Litematica Main Menu - Load Schematics Select the desired schematic and click "Load Schematic" in the lower left corner.

  1. Adjust and rotate the schematic

Use middle-click to select the schematic. Hold alt and scroll the mouse wheel to move it.

Litematica Main Menu - Configure Schematic Select the desired schematic and click the configure button to enter the configuration interface.
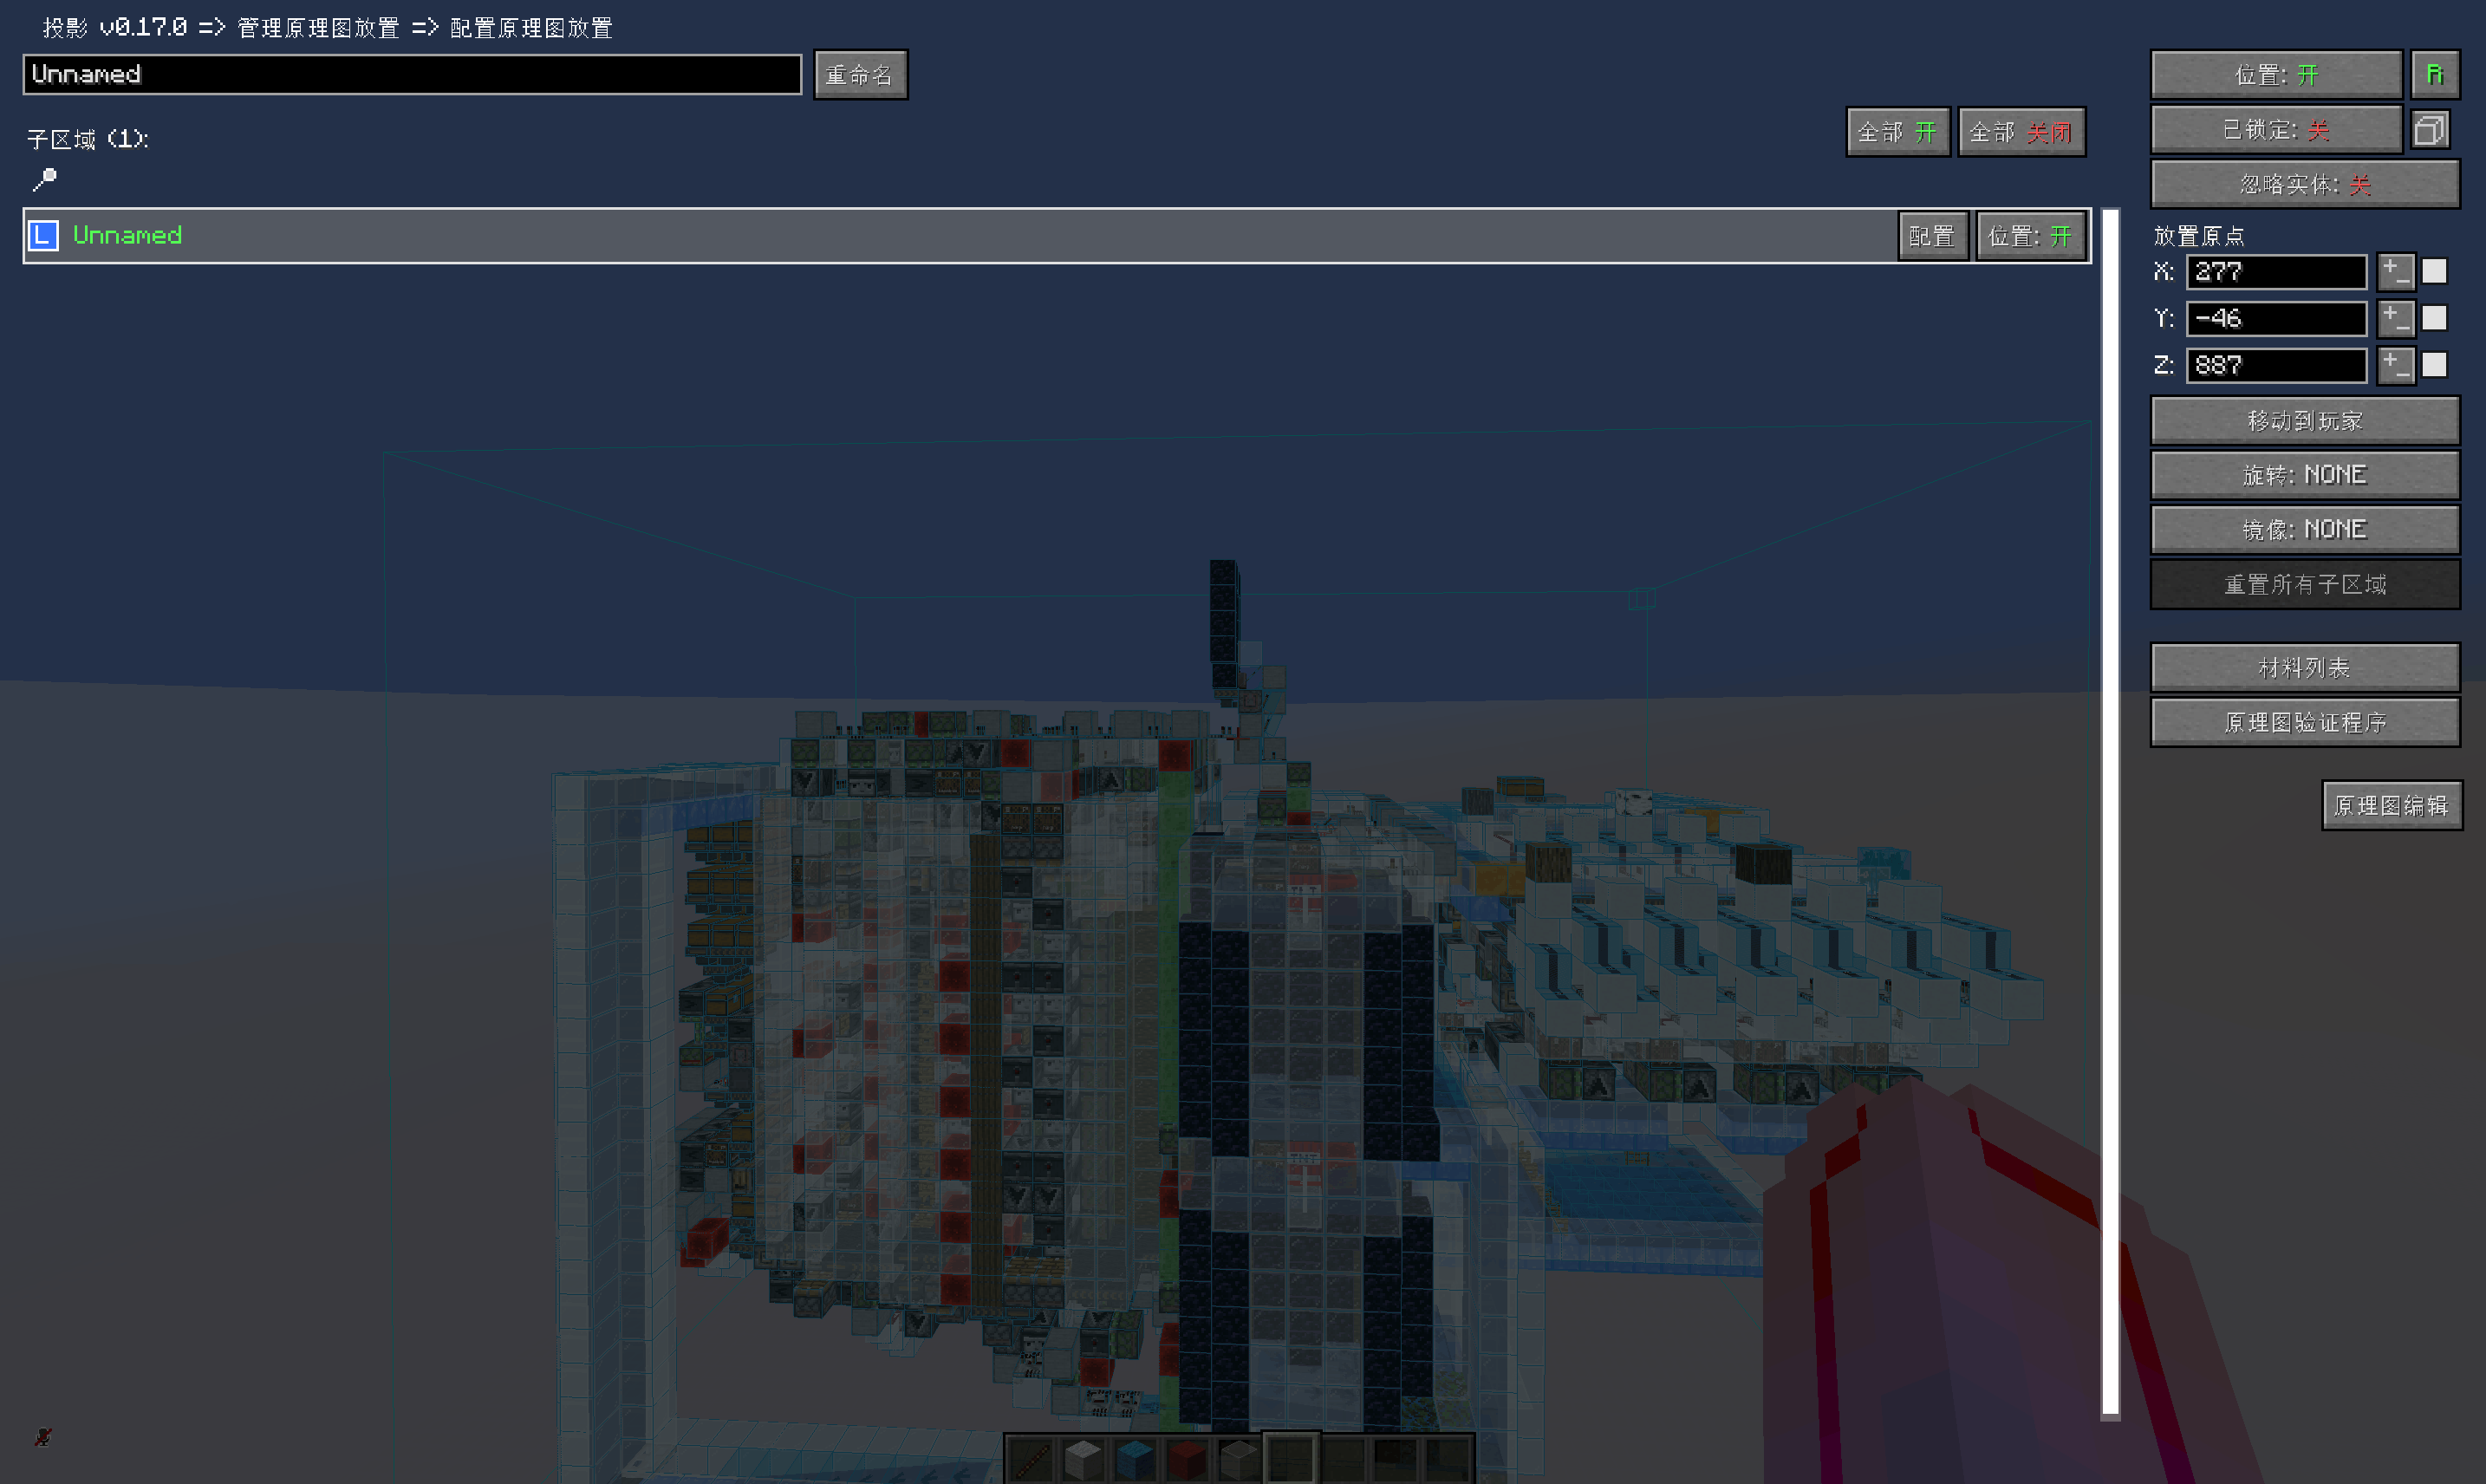
// IMG_LOAD
Litematica Main Menu - Configure Schematic Select the desired schematic and click the configure button to enter the configuration interface.

On the right side of the configuration interface, you can adjust the schematic origin position and rotate/mirror the schematic.

Warning: Unless the author states otherwise, do not rotate or mirror machines, as this will likely cause them to malfunction.

  1. Paste the schematic (creative only)
Prev
Masa Gadget
Next附录
Stacks
Masa Mod
Path: Masamod/litematica.zh.md
SDU-Little-River+1
Word count: 479
Est. read time: 3 min
Last edited: 2026-07-12
Contributors:
  • SSDU-Little-River
  • BBFladderbeanawa
Created:
2025-01-23
Last edited:
2026-07-12
URL:
https://www.techmc.wiki/en/articles/masamod/litematica
Reuse
CC BY-NC-SA 4.0
02 Litematica Tutorial

02 Litematica Tutorial

1 Brief Introduction to Litematica

By default, the hotkey for the Litematica main menu is M. Press it to open the main menu.

In the configuration menu, you can change hotkeys and toggle various Litematica features.
When holding the Litematica tool in your main hand or offhand, the Litematica menu bar will appear in the lower left corner.

// IMG_LOAD
In the configuration menu, you can change hotkeys and toggle various Litematica features.When holding the Litematica tool in your main hand or offhand, the Litematica menu bar will appear in the lower left corner.

Use ctrl+scroll wheel to switch modes.

1.1 Mode 1 -- Area Selection

There are two area selection modes, switchable from the main menu. Beginners should use Simple mode, and set the corner mode to "Corners" in the Area Editor.

1.1.1 Simple Mode

In simple mode, there is only one selection area. Left-click and right-click to set the two corner points of your selection.
Use middle-click on a corner (or elsewhere in the selection) to select it. Once selected, hold alt and scroll the mouse wheel to move the corner (or the entire selection).

// IMG_LOAD
In simple mode, there is only one selection area. Left-click and right-click to set the two corner points of your selection.Use middle-click on a corner (or elsewhere in the selection) to select it. Once selected, hold alt and scroll the mouse wheel to move the corner (or the entire selection).

In the selection editor, you can change the name of the selection or save the schematic.

// IMG_LOAD
In the selection editor, you can change the name of the selection or save the schematic.

1.1.2 Normal Mode

For large machines, saving in simple mode can cause inconveniences during construction. Normal mode solves this.
In normal mode, selections are not created automatically. You need to create them manually:

  1. Open Litematica Main Menu - Selection Manager - New Selection
// IMG_LOAD
Normal Mode
  1. To create a sub-selection, select "New Sub-region" in Litematica Main Menu - Area Editor. You can also rebind the Add Selection hotkey in Configuration Menu - Hotkeys for faster access.
    Use middle-click to select a sub-selection corner (or the sub-selection itself).
    The final result is shown in the image
    // IMG_LOAD
    Normal Mode

    The steps to save the schematic are the same as in simple mode.

1.2 Mode 2: Schematic Placement & Mode 5: Schematic Paste

Import external schematics (skip if none).
It is recommended to enable the custom schematic directory in Litematica settings, so all game versions can share the same schematic save location.

// IMG_LOAD
Import external schematics (skip if none).It is recommended to enable the custom schematic directory in Litematica settings, so all game versions can share the same schematic save location.

Then place the downloaded schematics into this folder.

  1. Load the schematic in-game

Litematica Main Menu - Load Schematics Select the desired schematic and click "Load Schematic" in the lower left corner.

  1. Adjust and rotate the schematic

Use middle-click to select the schematic. Hold alt and scroll the mouse wheel to move it.

Litematica Main Menu - Configure Schematic Select the desired schematic and click the configure button to enter the configuration interface.

// IMG_LOAD
Litematica Main Menu - Configure Schematic Select the desired schematic and click the configure button to enter the configuration interface.

On the right side of the configuration interface, you can adjust the schematic origin position and rotate/mirror the schematic.

Warning: Unless the author states otherwise, do not rotate or mirror machines, as this will likely cause them to malfunction.

  1. Paste the schematic (creative only)
Prev
Masa Gadget
Next附录
Stacks